
title: "Pokopia Habitats Building Guide (2026): Upgrade Paths, Costs, Comfort, and Priority Strategy" description: "Learn Pokopia habitat mechanics: upgrade tiers, resource costs per tier, Comfort building strategies, type-specific habitat bonuses, and which habitats to prioritize in each game phase." keywords: ["pokopia habitats", "pokopia habitat building", "pokopia habitat upgrade", "pokopia habitat type"] date: 2026-04-06 author: Pokopia Guide Team lastUpdated: 2026-04-06
Pokémon Pokopia Habitat Guide
Mastering the art of building is essential for any successful trainer. In Pokémon Pokopia, a Habitat is a specific arrangement of plants, items, and furniture. When you place the right combination of items, you create a home that attracts specific Pokémon!
With over 200 habitats to discover, building diverse environments is the key to completing your Pokédex.
Habitats in Pokémon Pokopia are far more than Pokémon storage. They are production centers, comfort engines, and long-term resource multipliers. Building habitats efficiently means understanding upgrade costs, Comfort mechanics, and which habitats unlock which specialties. This guide breaks down the economics of habitat upgrades and helps you prioritize which habitats to build when.
TL;DR
Start with one starter habitat and expand to 3-4 by hour 20. Each habitat upgrade tier inflates costs (Tier 1: 10 lumber; Tier 2: 20 ore; Tier 3: 50 ore + rare materials). Comfort threshold unlocks (50+, 100+, 150+) grant production bonuses and visiting Pokémon bonuses—these ROI faster than construction speed alone. Prioritize habitats by specialty unlock, not by prettiness: Build + Collect habitats first, then type-specialized habitats (Fire, Water).
Habitat Basics
What Do Habitats Do?
- House Pokémon: Store multiple Pokémon in one habitat (capacity scales with Comfort)
- Generate Resources: Housed Pokémon passively produce items tied to their type and specialty
- Build Comfort: Pokémon receive Comfort from habitat environment (type match, decor, flavor foods)
- Unlock Bonuses: At Comfort milestones (50, 100, 150), Pokémon activate special perks—production boosters, visitor attraction, evolution triggers
Habitat Tiers (1-4)
Each habitat level increases capacity, production rate, and unlocks advanced decor/specialty combinations.
| Tier | Build Cost | Capacity | Production Rate | Special Unlock |
|---|---|---|---|---|
| Tier 1 | 10 Lumber | 3 Pokémon | 1× | Basic comfort system |
| Tier 2 | 20 Iron Ore | 6 Pokémon | 1.2× | Type matching bonus |
| Tier 3 | 50 Iron Ore + 10 Copper | 10 Pokémon | 1.5× | Specialty building bonus |
| Tier 4 | 100 Pokemetal + 20 Gold Ore | 15 Pokémon | 2.0× | Master habitat—all bonuses active |
Comfort Mechanics
Comfort is the core ecosystem. Higher Comfort = more production, more visitors, more activity.
What Raises Comfort?
- Type Matching (e.g., Fire-type Pokémon in a Fire habitat): +5 Comfort per Pokémon
- Flavor Matching (e.g., Dry food to a Dry-preferring Pokémon): +10 Comfort per food gift
- Decorations (e.g., themed decor in Fire habitats): +1-2 Comfort per decoration
- Specialty Synergies (housing Build specialty Pokémon in construction-heavy habitats): +5 Comfort and productivity
Comfort Thresholds and Bonuses
| Comfort | Bonus Effect | Gameplay Impact |
|---|---|---|
| 50+ | Type production boost (+20%) | Basic Pokémon start generating type-specific items |
| 100+ | Visitor attraction (+50% chance) | Random Pokémon from other habitats visit, boosting their Comfort too |
| 150+ | Master bonus (unlocks evolution variants) | Special habitat evolutions trigger; production output multiplied |
| 200+ | Peak state | All bonuses stack; max production; rare spawns more common |
What is a Habitat?
A Habitat is triggered when you place specific items in close proximity. Once the requirements are met, the area transforms, and you'll see grass shaking or Pokémon appearing shortly after.
Pro-Tip: Rare Pokémon have a lower spawn rate. Building multiple instances of the same habitat improves your chances of finding them!
Habitat Priority Strategy
Phase 0-1 (Hours 0-5): The Starter
- Build: 1 Tier 1 Starter Habitat
- Pokémon: Your initial team
- Goal: Just survive; focus on story progression, not optimization
Phase 1 (Hours 5-15): The Anchor Setup
- Build: 1 Fire habitat (Tier 1-2) + 1 Water habitat (Tier 1)
- Rationale: Fire habitats unlock burn-based production; Water habitats unlock farming and decoration elements
- Comfort Target: 50+ in Fire habitat (unlocks Burn specialty training)
- Specialties to House: One
 Build specialist and one
  Collect specialist
Phase 2 (Hours 15-40): The Production Scaling
- Build: Add 2-3 specialized habitats (e.g., Psychic, Grass, Electric)
- Upgrade Target: Bring Fire and Water habitats to Tier 2-3
- Comfort Target: 100+ in 2 habitats (unlock visitor bonuses)
- Specialties to House: Prioritize
 Recycle and
  Litter specialists
Phase 3 (Hours 40+): The Late-Game Specialization
- Build: Max to 6-8 habitats, each type-specific (Fire, Water, Psychic, Grass, Rock, Electric, Dark, Steel)
- Upgrade Target: All core habitats to Tier 3-4
- Comfort Target: 150+ in 4-5 habitats (unlock master bonuses)
- Specialties to House: Mix-and-match based on current production bottleneck
Cost Analysis: When to Upgrade vs. Build New
Building a new Tier 1 habitat costs 10 lumber. Upgrading a Tier 1 to Tier 2 costs 20 ore. By hour 15, ore is abundant-enough that upgrading is faster than building from scratch.
Decision Framework:
| Upgrade Scenario | Cost | ROI |
|---|---|---|
| Upgrade Tier 1 → Tier 2 (ore available) | 20 ore + 5 hrs craft time | +20% production; faster ROI |
| Build new Tier 1 (need more Pokémon storage) | 10 lumber + 2 hrs craft time | +1 habitat slot; planning-dependent |
| Ignore upgrade, focus on story | 0 | Slower long-term production |
Rule of Thumb: By hour 20, always upgrade over building. You'll have 3-4 habitats, and Tier 2 production > Tier 1 × 5.
Early Game Habitat List (Habitat Dex)
Advanced: Specialty Habitat Synergies
Certain Pokémon specialties amplify when grouped in matching-type habitats:
Build + Construct Specialties
Housing a Build specialist in a construction-heavy habitat (one with multiple upgrades in progress):
- Builds complete 50% faster
- Generated resources = 25% bonus building materials
Collect + Farming Habitats
Housing Collect in a Water/Grass habitat:
- Doubled item output from habitat production
- Crop yields increase by 25%
Recycle + Trash/Item Habitats
Housing Recycle in a Psychic/Dark habitat:
- Unused items convert to currency (10-50% efficiency)
- Production chains self-sustain longer between harvests
Common Mistakes
Mistake 1: Building Too Many Habitats Too Fast
Spreading resources across 6+ habitats by hour 20 forces 1-2 Pokémon per habitat (low Comfort). Better: 3-4 habitats, well-stocked and high Comfort.
Mistake 2: Ignoring Type Matching
Housing Fire Pokémon in a Water habitat = half Comfort gain. Type matching is highest ROI Comfort multiplier.
Mistake 3: Delaying Upgrades
Leaving habitats at Tier 1 past hour 20 is a pacing mistake. Tier 2 upgrades pay off within 5 hours of unlock.
Mistake 4: Decorating Before Comfort
Decorations are fun but low-impact vs. housing matching Pokémon types. Save decor for hour 30+.
Related Guides and Specialties
FAQ
How many habitats should I have by hour 30?
3-4 habitats (including starter), all at least Tier 1, with 1-2 at Tier 2.
What's the fastest way to reach 100 Comfort?
Type matching + flavor gifts. House type-matching Pokémon and gift their preferred flavors every 2-3 hours.
Is it worth upgrading Tier 2 → Tier 3 before building new habitats?
Only if you're focusing on production scaling. If you need more Pokémon storage, build new Tier 1 first.
Which specialty habitat should I build first?
Fire or Water. Both unlock production chains early. Build in this order: Fire → Water → Psychic.
Early Game Habitat List (Habitat Dex)
Here are the most common habitats you'll need to build when starting your journey in the Withered Wasteland:
| ID | Habitat Name | Requirements | Attracted Pokémon |
|---|---|---|---|
| 001 | Tall Grass Habitat | 4x Tall Grass tiles | Bulbasaur, Charmander, Squirtle |
| 002 | Tree-Shaded Tall Grass | 1x Large Tree + 4x Tall Grass | Scyther, Heracross |
| 003 | Boulder-Shaded Grass | 1x Boulder + 4x Tall Grass | Timburr |
| 005 | Seaside Tall Grass | 4x Tall Grass + 2x Ocean Water | Water-type Pokémon |
| 007 | Illuminated Tall Grass | 4x Tall Grass + 1x Lighting Item | Rare Night Pokémon |
| 008 | Pretty Flower Bed | 4x Wildflowers | Flower-loving Pokémon |
| 010 | Hydrated Flower Bed | 4x Flowers + Beside Water | Water/Grass types |
How to Build Your First Habitat
1. Gather Materials
Most early habitats require Tall Grass or Flowers. You can create these using moves:
- Leafage: Use this move (Press
ZRto switch) to create grass or flower tiles on the ground. - Water Gun: Use this to water saplings to turn them into Large Trees.
2. Placement Strategy
Habitat items must be "bunched together" in a small plot. For example, to make a Tree-Shaded Tall Grass Habitat (required for the Lumber quest), stand near a tree and place 4 grass tiles directly around its base.
3. Real-Time Construction
One of the most important things to remember is that construction is tied to real-world time.
- Patience is Key: Once you've placed the items, your Pokémon will begin building. For larger structures, this can take several hours.
- Planning: For more details on how time affects your progress, see our Game Length & Time Mechanics Guide.
3. Monitoring for Spawns
After building, keep an eye on the habitat.
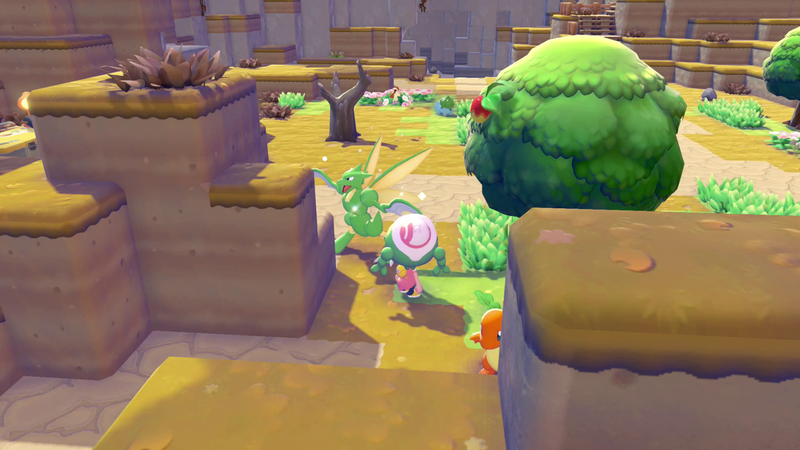
- Shaking Grass: Indicates a Pokémon is about to appear.
- Speech Bubbles: Some Pokémon (like Scyther) will appear with a request bubble. Talk to them to unlock new moves or items!
Bulldozing Mechanics
If you make a mistake or want to redesign your ranch, you can use the Bulldoze function.
- Resource Refund: Unlike many games, Pokopia is generous! Bulldozing items often returns a portion of the materials used, allowing you to iterate on your designs without losing everything.
- Clearing Space: Use Bulldoze to clear old habitats to make room for high-level specialized environments as you progress.
Advanced Tips for Habitat Builders
- Environmental Level: Many habitats only unlock or successfully attract Pokémon once your ranch reaches a certain Environment Level.
- Real-Time Clock: Some Pokémon only appear in habitats at specific times of day (Day/Night cycles).
- Redundancy: If a "Very Rare" Pokémon isn't appearing, don't delete the habitat! Build a second or third one nearby to stack the spawn probabilities.